

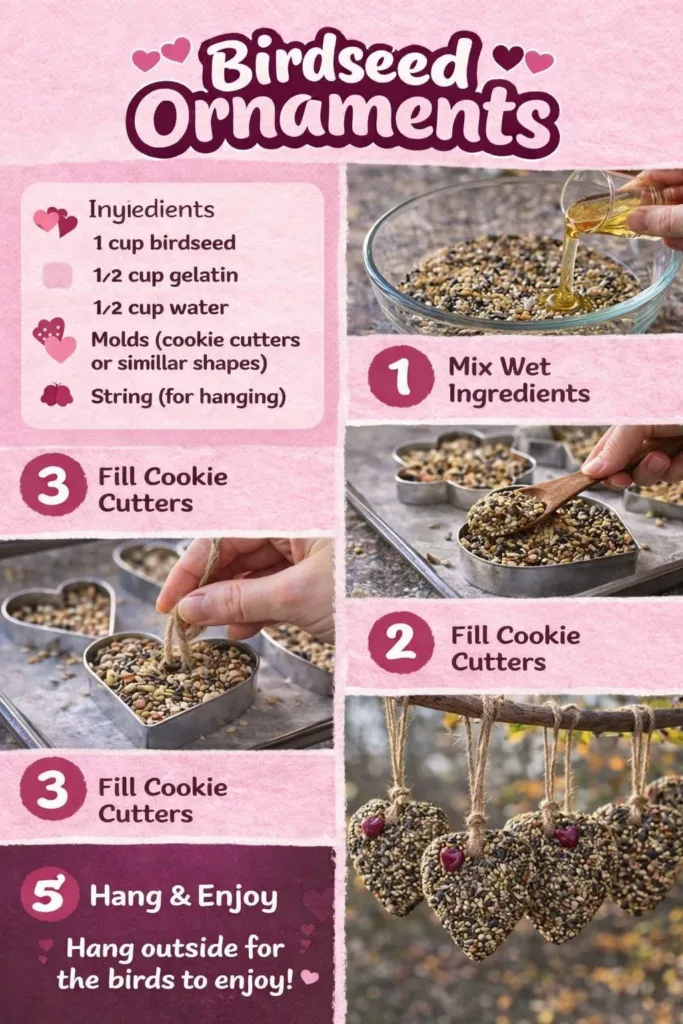
I press the small disc of seed mix into my palms and feel the tiny grains slide and whisper between my fingers. Sunlight drifts across the table and picks out the warm gold of millet, the glossy dark seeds, the irregular edges of sunflower kernels. Making Birdseed Ornaments slows time in a way that feels like a gentle exhale. The texture grounds me, the quiet stickiness of the binder holds the shape, and the thought of a robin pausing at the finished ornament brings a steady, cozy calm.
The Quiet Joy of Making Birdseed Ornaments

This project gives a soft kind of satisfaction. You work with simple, natural materials. You hear the light clink of seeds in a bowl. You feel the subtle give when the mixture compresses. Each small, repetitive motion helps the mind settle. Birdseed Ornaments invite you to be present with texture, temperature, and the slow shaping of form.
There is also a quiet ritual in sharing the result with birds outside your window. Hanging an ornament is a small act of care that keeps you connected to the cycle of seasons. It asks nothing of you but attention and a few mindful minutes. For me, making these ornaments feels like making a tiny offering, one that brings movement and birdsong to a quiet corner of the day.
If you enjoy tactile crafts you might like exploring other soft ornament projects on the site, such as this cozy take on galaxy heart ornaments that also play with color and texture.
A Gentle Look at the Process
Before you gather anything, imagine the steps as a slow rhythm. You will measure and mix, press and shape, thread and hang. The sounds will include light clinks, a soft scrape as seeds meet bowl, and the faint rustle of dried herbs if you add them.
The movement stays small and contained. You use your palms to press, your fingertips to smooth, and sometimes a spoon to coax seeds into edges. The binder I prefer warms slightly in my hands as I knead it with the seeds. That warmth helps the mixture become cohesive and pleasingly malleable.
This project pairs well with quiet music or the open window. If you like, spend time earlier in the day collecting interesting bits twine, cookie cutters in different shapes, or small cookie molds. These small rituals make the process feel like a deliberate, gentle practice rather than a hurried task.
If you want another project to sit beside this one in an afternoon of making, try the slow, crystal-like textures in the growing crystal heart ornaments. They offer a different kind of patience and wonder.
Materials You’ll Need
- Birdseed mix, plain or mixed (easy to find; buy bulk for more ornaments)
- Plain gelatin or a vegetarian binder such as agar for a vegan option (simple chemistry: binder holds seeds)
- Warm water for dissolving binder
- Mixing bowl (medium size)
- Spoon and measuring cups (or a kitchen scale)
- Cookie cutters or ornament molds (metal or silicone; optional)
- Twine, ribbon, or natural jute for hanging (substitute-friendly)
- Skewer, straw, or small straw-like implement to make a hole before drying
- Parchment paper or a silicone mat (for drying)
- Small baking tray (flat, to support shapes while drying)
- Optional: dried cranberries, raisins, chopped unsalted nuts (check for bird safety), herbs like rosemary or marigold petals for scent and color
- Optional: non-toxic glitter or food coloring for visual variation (use sparingly and choose bird-safe options)
A few notes: gelatin works reliably because it sets into a flexible, slightly rubbery gel that holds seeds as it dries. Agar offers a plant-based alternative with similar setting properties when used correctly. If you choose additives, keep them safe for birds no chocolate, no large amounts of salt, and avoid anything with artificial sweeteners. Use a lightweight, neutral-tasting seed mix so birds will actually eat the ornament.
Step-by-Step Directions
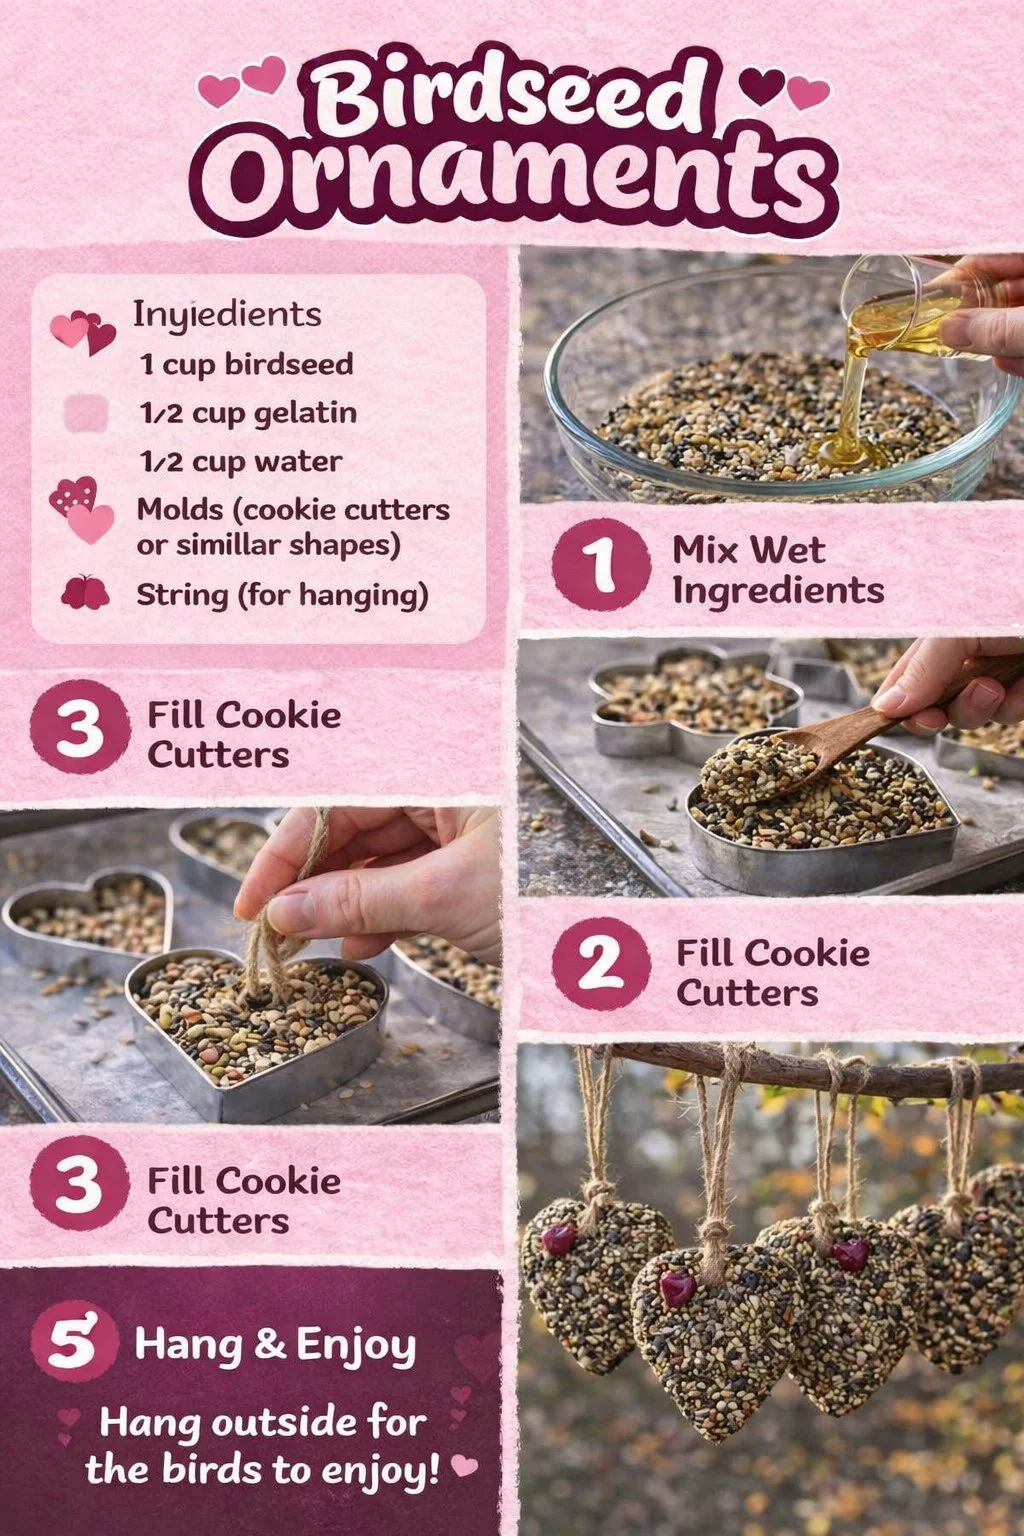
- Prepare your workspace with parchment paper and a tray.
Lay out cookie cutters or molds and have your twine ready.
The parchment keeps seeds from sticking and makes cleanup calm. - Measure seeds into the bowl and admire their color and texture.
Gently stir them to notice sound and movement.
This simple act starts the slow rhythm of the project. - Dissolve the binder in warm water according to package directions.
Use gentle heat and stir until fully clear and smooth.
The warm liquid helps the seeds bind and gives you control. - Pour the binder gradually into the seed bowl and mix slowly.
Use a spoon to fold rather than beat so seeds stay whole.
Aim for a mix that holds when pressed but does not drip. - Spoon the mixture into a cookie cutter or mold on parchment.
Press down with your palm or the back of a spoon to compact.
Compacting removes air pockets and creates a smooth face. - Use a skewer or straw to make a small hole at the top for hanging.
Make the hole before the mixture dries so it stays open and neat.
Keep your motions gentle to preserve the shape. - Leave ornaments on the tray to dry in a warm, airy spot.
Drying can take 24 to 48 hours depending on humidity.
Rotate them gently if needed so they dry evenly. - When fully dry and firm, remove from mold and thread twine.
Hang where birds can reach but cats and squirrels cannot easily access.
Watch quietly and enjoy the small visits they bring.
Bringing Birdseed Ornaments Into Your Space

Once you hang these ornaments, they change your space in small, meaningful ways. Place them on porch railings, from tree branches, or near a window feeder where you can watch birds come and go. Each ornament adds a little movement and texture to your yard or balcony.
Consider hanging a pair at different heights so a variety of birds can feed comfortably. Low placement favors ground-feeding birds, while higher placement calls to finches and chickadees. The visual rhythm of several ornaments swaying softly creates a calm, meditative tableau outside your window.
If you enjoy combining projects, hang a few of these ornaments on a clothespin string with other lightweight crafts like paper stars or small felt shapes. That mix can turn a balcony into a quiet gallery that changes with the weather and with the visitors it attracts. For another gentle ornament to pair visually or in a gift set, the shimmering tones of growing crystal heart ornaments contrast nicely with the earthy texture of birdseed.
Making This DIY Last
These ornaments have different lifespans depending on placement and weather. In a sheltered spot they can last weeks, sometimes months, while in wet weather they soften and may break down faster. Expect wildlife interaction to shorten lifespan; that is part of the cycle.
Store unused ornaments in an airtight container in a cool, dry place. If they soften slightly in storage, let them air in a sunny window for a day before presenting them outdoors. If you prefer to reuse a shape, crumble a soft ornament into a bowl and press it into a fresh mold with new binder. The reused seeds will have a slightly different texture but a familiar comfort.
If you plan to gift ornaments, package them in breathable paper or a perforated box so they do not trap moisture. Include a small note with care suggestions and a gentle reminder to hang them in a protected spot. This small instruction keeps the ornament looking and feeling its best for longer.
When an ornament finishes its life outdoors, compost the remnants if they contain only natural ingredients. Composting returns the nutrients to the soil and completes the gentle loop of making, sharing, and returning.
What I’ve Learned While Making This
Use a lighter hand than you think. Overly wet mixtures become sticky and hard to shape. Start with less binder and add small amounts until the seeds hold.
Choose sunflower seeds sparingly. Birds adore them, but their larger size can make shapes lumpy. Combine them with smaller seeds for a smoother surface and a more even drying time.
Work in small batches. My first experience made a big bowl of mix and I felt rushed to shape everything before the binder began to set. Small, focused batches allow you to linger over each ornament and enjoy the calming repetition.
Experiment with shapes but respect balance. Big, long designs may break under their own weight. Keep ornaments compact and balanced so they dry evenly and hang without twisting.
Treat this as a shared activity. I have made these with a neighbor and with a quiet child, and the shared attention feels like a small ritual. Let conversation drift, let hands touch the seeds, and let each person choose what to add. The result always carries that shared warmth.
Gentle Tips & Variations
- Invite scent gently. Add a teaspoon of dried rosemary or citrus peel for a soft aroma. Use sparingly to avoid overwhelming birds.
- Make a bird-safe seed cake. Mix equal parts suet or rendered chicken fat with seeds for a higher-energy treat in winter. Use this only in cold months and keep it out of direct sun.
- Try different molds. Small shapes like circles, stars, or leaves dry more evenly than complex silhouettes. If you love intricate shapes, use silicone molds that release gently.
- Add natural color. Tiny amounts of beet powder or spirulina can tint the mixture and remain safe for birds when used in moderation.
- Personalize for gifts. Tie a small wooden tag to the twine with the date and a short note. The tag adds a quiet, human touch.
These ideas offer gentle invitations rather than rules. Try one at a time and notice how it changes your making experience.
FAQs About Birdseed Ornaments:
u003cstrongu003eWill birds actually eat these ornaments?u003c/strongu003e
u003cpu003eYes. Most birds peck at the surface and take seeds away bit by bit. Choose seed mixes with familiar favorites like millet and sunflower seeds to attract a variety. Watch quietly and you will see visits soon after hanging.u003c/pu003e
u003cstrongu003eCan I make these without gelatin?u003c/strongu003e
u003cpu003eYes. You can use agar as a plant-based binder. Agar sets firmer, so follow the package instructions and adjust liquid to achieve a slightly pliable texture. Both binders work because they create a gel that traps seeds together as they dry.u003c/pu003e
u003cstrongu003eAre any of these ingredients harmful to birds?u003c/strongu003e
u003cpu003eAvoid chocolate, large amounts of salt, and artificial sweeteners. Use unsalted, natural seeds and avoid additives that birds cannot digest. If you add extras like nuts or fruit, keep portions small and stick to bird-safe options.u003c/pu003e
u003cstrongu003eHow do I keep squirrels from taking them?u003c/strongu003e
u003cpu003eHang ornaments in locations that are hard for squirrels to reach, such as thin branches or under eaves. Use baffles or place them near feeders that favor smaller birds. Sometimes the best defense is multiple feeding spots that distract larger animals.u003c/pu003e
u003cstrongu003eCan children help make these?u003c/strongu003e
u003cpu003eDefinitely. Children enjoy the tactile aspects and the simple shaping. Supervise the use of warm binder and teach gentle pressing. Focus on the sensory experience rather than precision and celebrate small imperfections.u003c/pu003e
A Gentle Note Before You Go
When you hang your first ornament, pause and breathe. Notice the light passing through nearby leaves, the small wind that begins to play with the twine, the pattern of seed colors. These moments unfold slowly. Let the making remain a soft practice: a place to return to when you want to feel rooted and present.
Return to this craft seasonally. Change the seed mix with the rhythm of the year. Add fragrant herbs in the cool months, keep the shapes simple in warmth, and let each batch reflect the time you made it. That gentle continuity becomes part of how you anchor the day, join the birds, and celebrate small acts of care.
Conclusion
If you want a clear recipe to compare techniques, I like to reference a simple, tested method such as the one at a helpful recipe from Fountain Avenue Kitchen for its straightforward proportions. For an illustrated step-by-step tutorial, this guide at One Little Project offers lovely photos and extra shaping ideas.
PrintBirdseed Ornaments
Create delightful birdseed ornaments to attract birds to your garden, using simple materials and a gentle crafting process.
- Prep Time: 15 minutes
- Cook Time: 0 minutes
- Total Time: 48 hours
- Yield: 10 ornaments
- Category: Craft
- Method: Crafting
- Cuisine: DIY
- Diet: Vegetarian
Ingredients
- Birdseed mix (plain or mixed)
- Plain gelatin or a vegetarian binder (such as agar)
- Warm water (for dissolving binder)
- Mixing bowl
- Spoon and measuring cups
- Cookie cutters or ornament molds (optional)
- Twine, ribbon, or natural jute for hanging
- Skewer or straw (to make a hole)
- Parchment paper or silicone mat (for drying)
- Small baking tray (for drying)
- Dried cranberries, raisins, chopped unsalted nuts (optional)
- Dried herbs like rosemary or marigold petals (optional)
- Non-toxic glitter or food coloring (optional)
Instructions
- Prepare your workspace with parchment paper and a tray.
- Measure seeds into the bowl and admire their color and texture.
- Dissolve the binder in warm water according to package directions.
- Pour the binder gradually into the seed bowl and mix slowly.
- Spoon the mixture into a cookie cutter or mold on parchment.
- Use a skewer or straw to make a small hole at the top for hanging.
- Leave ornaments on the tray to dry in a warm, airy spot.
- When fully dry and firm, remove from mold and thread twine.
Notes
Use a lightweight, neutral-tasting seed mix. Avoid chocolate, large amounts of salt, and artificial sweeteners. Consider hanging ornaments at different heights to attract varied bird species.